
The Raspberry Pi Pico may be programmed in the Arduino IDE. There are three board libraries available but I found that the one written by Earle F. Philhower, III works best. Below are the steps that I took to get the example blink sketch loaded on the Raspberry Pi Pico.
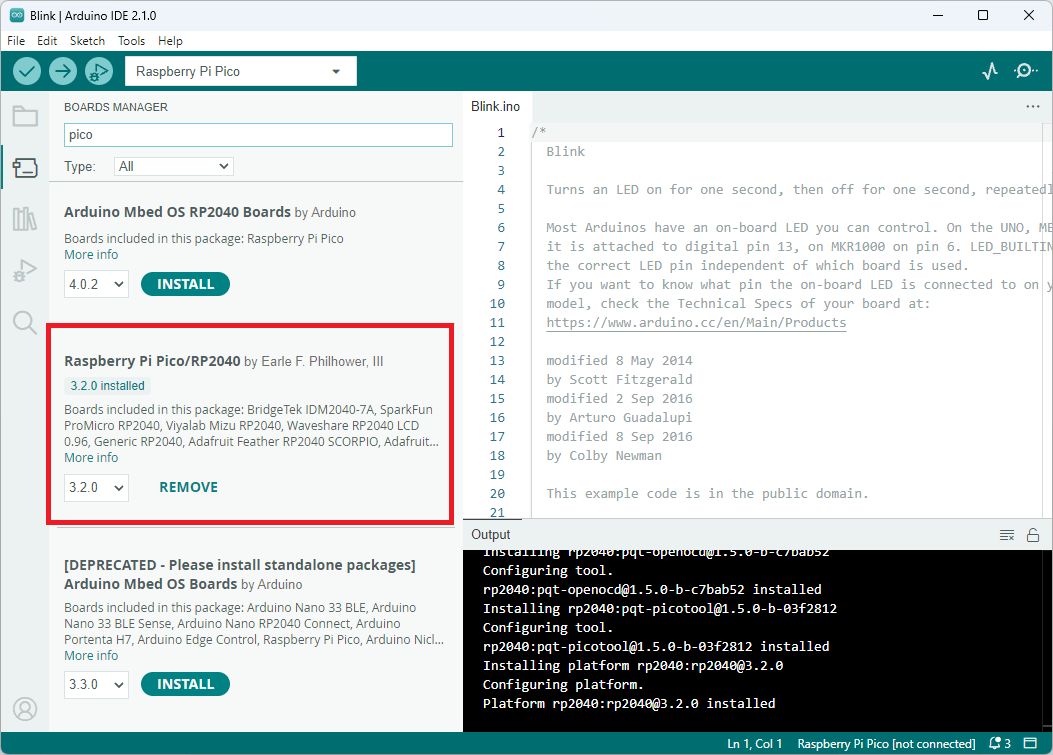
- In the Arduino IDE, open the Boards Manager
- Type “Pico” in the search box
- If the “Arduino Mbed OS RP2040 Boards” is installed, click the “Remove” button to uninstall it
- If the “Raspberry Pi Pico/RP 2040” is not installed, click the “Install” button to install it
- Connect the Raspberry Pi Pico to the PC through the USB Port
- In the Arduino IDE menu, select the “Raspberry Pi Pico” board by going to Tools > Board > Raspberry Pi RP2040 Boards(3.2.0) (in Sketchbook) > Raspberry Pi Pico

- In the Arduino IDE menu, select Tools > Port from the menu
- If this is the first time connecting the Raspberry Pi Pico to the PC, select UF2 Board

-
- If this is not the first time, then a list of COM Ports are available. Open the Device Manager to see the available COM Ports and determine which one is the Pico board. You may unplug the Pico Board, wait for the Device Manager to refresh with one less COM Port, then plug the Pico board back in. Note, which new COM Port appears, that will be the one to select in the Arduino IDE.


- Open the example “Blink” sketch from the menu File > Examples > 01. Basics > Blink
- Click the “Upload” button in the Arduino IDE to load the sketch onto the Pico board
NOTE: You may see several warnings about whitespace. These warnings may be ignored

- You should see the LED on the Pico board flashing once the sketch is uploaded
Hopefully, this gets you up and running. It is always a good idea to run the example blink program first when configuring a new board. It lets you know right away if things are working as expected. Once that works, then move onto your code.